Saturday, January 29, 2011

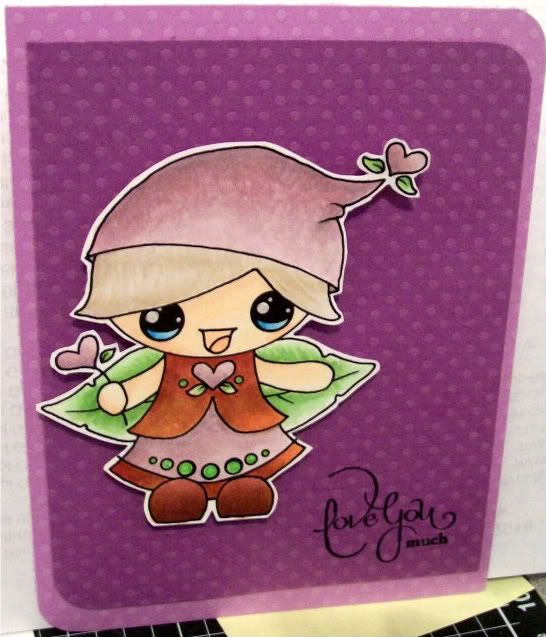
Simple Valentine's Card

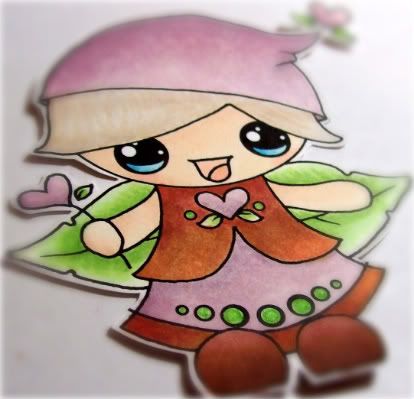
I decided to make a very simple Valentine's Card for my 4 year old niece.  Isn't this image adorable?  I found it here.  I had so much fun coloring this!!  I was able to use the Feathering technique as well as the Dirty Rag Technique.  Can you tell where I used them?  I actually used a sponge instead of a rag too! 

I feathered her hair (I wish the picture could show the detail).  Then I used the sponge sprayed with Blending Solution on the hat and shirt to add some texture.  

I just tried to keep this very simple so that it could be easily duplicated if needed for school too!

Hope you enjoyed looking!!


Skin: E50, E00, E21, YR01, RV00, R12
Eyes: B00, B02, B04, Clear Spica, Smooch
Skirt, Hat, Hearts: RV91, RV93, V95, Melon Spica 
Shirt: E97, E99, E09
Shoes: E17, E37, E29
Leaves: G20, YG11, YG13, YG17
Hair: E40, E42, E70, E31

thanks for looking!!!


Supplies Used: 
Stamps: SU! Well Scripted (No longer available)
Paper:   Dotted Swiss MultiPack
Ink:        Memento Tuxedo Black, Copics, Atyou Spicas, Smooch
Stash:    corner rounder   

Thursday, January 27, 2011

Chunky ATC Chris-styled

Start with a scrap piece of wood 2.5x3.5x1.5. (An online friend sent me the wood canvas but if you have access to 2x4 boards and someone to cut them for you, you’re golden!) I painted the entire block with acrylic white paint and set it aside to dry. (Actually she sent me four pieces and I have three more to work with—yippee!)


While the paint was drying, I took out my two Tim Holtz Alterations Snow Flurries and Snowman embossing folders. Using Stormy Sky Distress Ink and my brayer I inked the “indented” side of the folder and carefully laid the white paper in the folder and ran it through my Big Shot Express. Love how the background was now blue, even though I got some blue on the snowman—hey snow has a bluish tinge, right. In the snow flurries folder I placed a piece of acetate and ran it through the machine. By now my snowman was dry enough to cut out. I knew he was taller than my block, so I measured up to 3.5 and then cut around his arm and head. Using Cinnamon Toast Fun Flock I glued it along the snowman’s arms. I filled in his carrot nose with Orange Peel Stickles. Then, I dabbed the top part of the image with my Embossing Magic powder, colored in the hat with my embossing pen, sprinkled it with black embossing powder, and heated it with my heat gun. I set this aside to dry. Next I used the Distrezz-it-All to rough up the edges and added some jewels in the center of the snowflakes.


I then started on side two by cutting out ‘tweety’ from Stretch Your Imagination at 2.5 inches first in brown and then red. I cut off the red bird and glued it on top of the brown one. I cut a sled from the Wild Card cartridge at .5 inches—the base out of red and the layers out of tan scraps. I sketched a hill on the block and then used Stormy Sky, Tumbled Glass, and Weathered Wood Distress Inks to ink in a sky and stamped ‘Let It Snow’ on the bottom with a blue pigment ink.


While I waited for that to dry, I kept throwing away ideas for the edges. I then thought of all the little scraps of snow I saved from when I punched my Christmas Thank You cards (I never throw anything out) and decided to use Glossy Accents to randomly glue them on all four edges. Once that was done I was ready to put the chunky ATC together. I used Scor-Tape to adhere the Snowman and Glossy Accents to attach the bird and branch. After that I drew a few lines with my White Liquid Applique pen and heated it to add some dimension. I left that dry over night before attaching my sled using pop up dots and the embossed acetate sheet, using some Glossy Accents in the corners to hold it in place.

One ATC down, three more to go; what about you?

Cutters Creek Shopping List:
Tim Holtz Alterations Snow Flurries and Snowman embossing folders
Stormy Sky, Tumbled Glass, and Weathered Wood Distress Inks
Brayer
Acetate
Cinnamon Toast Fun Flock
Orange Peel Stickles
Embossing Magic
Black embossing powder
Distrezz-it-All
Glossy Accents
Scor-Tape
White Liquid Applique pen

Tuesday, January 25, 2011

Tutorial Tuesday - Glimmer Mist with Mandie

Hey, Everyone! I'm back with another fun Glimmer Mist Tutorial! I've decided to extend the deadline for the contest until Kim and I return from CHA... so the winner will be announced on Friday February 4th. So you have an extra week to add the link with your blog post to any of the Tutorial Tuesday posts (just add it as a comment)! So have you enjoyed this month's Tutorial Tuesdays? Any comments or suggestions for products you would like to see in the future? Next month we will be showcasing a favorite.... Stickles! And leading up to Valentine's Day we will be featuring some Valentine's Day projects, so make sure you check back often... and a little birdie told me there *might* be another challenge next month so get your Stickles ready!

Ok, on to today's project! You don't have to do any fancy masking techniques or anything to have fun with Glimmer Mist... I began this project with a piece of plain White Cardstock!


I sprayed my cardstock with a few squirts of the Meadow Green Glimmer Mist. Here's a fun tip... if you want more of a *mist* look, hold it farther away and spray quickly while keeping your hand moving. For a more *raindrop* look, hold the bottle closer and don't move it much. And remember to shake the heck out of it to prevent the sprayer from clogging.

I kind of dabbed the green a bit with my paper towel and then added Purple Pansy Glimmer Mist. Notice my Bazzill Splat Mat behind my paper to protect my desk. It is non-stick and heat resistant so you don't have to worry about scorching your desk while you are drying your paper with your Heat Gun!

Here's a look at both colors after I dried them with my heat gun.

Next I added some white paint to the edge of my 5" x 7" photo and my 6" x 8" photo mat. I just used my Adirondack Acrylic Paint Dabbers Bottle in Snow Cap and swipped it along the edges. Then I let it dry for a few and then dabbed more paint around it. Just layer until it looks the way you want it to. I sent them in front of the space heater under my desk to dry.... just don't use a heat gun... you don't want the paint to bubble.

I wanted to add a little Bling to my page and for some reason I needed a circular element so I cut a 10 1/2" circle and then folded in until I had these segments. Then I laid it on my background hanging off slightly and make little paper marks at the segments. I decided to add some rhinestones with my i-rock tool. You could also use Twinkle Jewels or the Kaisercraft Rhinestones! I was feeling lazy and didn't want to get up to grab my Twinkle Jewels, LOL!

Here's a look at some of the rhinestones. The white spots are the ones I decided to remove because they would be behind my photo.... you can also see the Scor Tape that I added to attach my ribbon. After I took this photo I decided I needed more bling so I used the same circle and lined up the spokes in between the jewels and made my marks again.

I added my title cut from the Robotz Cricut cartridge at 1 1/2" and my black and white polka dot ribbon. But I felt like it still needed something....

So I grabbed the closest White Flower. I love the Color Me Crazy flowers because they are made to color! Use your Glimmer Mist, Copics, Stickles... what ever you want!

Notice I REALLY soaked this flower. I wanted a really deep purple!

I added a couple of other flowers and a button from my stash...

...and add little journaling. And NOW I feel like my layout is complete! The photo is of our daughter Penny when she was two "driving" her Daddy's Mustang. She is still in love with his car!

I hope you enjoyed our last week of Glimmer Mist! Don't forget to grab your mists and enter our challenge to WIN more Glimmer Mist :)

Cutters Creek Shopping List:
Glimmer Mist - Meadow Green and Purple Pansy
Bazzill Splat Mat
Adirondack Acrylic Paint Dabbers Bottle in Snow Cap
Twinkle Jewels
Kaisercraft Rhinestones
Color Me Crazy flowers

Sunday, January 23, 2011

Sandi’s Valentine Card

Hi Everyone, This is a quick and easy card I made with Valentine Hanna from the Pixie Cottage collection.


I colored her using Copic markers. Her hair is Pale Yellow Y11 and Cadmium Yellow Y15. Her hair band is Cool Shadow BG10 and I added Turquoise Stickles to match the sparkle in her dress. Hanna’s dress is Cool Shadow and Horizon Green BG34. The hearts in her basket are colored with Sugar Almond Pink RV02 and Lipstick Red R29 with a dash of Magenta Stickles. Her basket is Pale Yellow and Golden Yellow Y17 with a small amount of Copper Stickles. I used a Spellbinder Scallop Circles and my Cuttlebug to frame Hanna.


I covered the White hearts with Diamond Stickles and applied Polar White Flower Soft around the outer edge of the large hearts and completely covered a few of the small hearts.


The finishing touch is a shiny sheer ribbon attached at the back with a strip of Scor Tape. Check often for more fun valentine ideas! And don't forget about our Glimmer Mist contest... you can enter up until 11:59 Monday Feb 24th. The winner will be announced on Tuesday Feb 25th. Just add a comment with your link to any of the "Tutorial Tuesday" posts this month. Winner will be chosen by Random.org so let's see what you can do with Glimmer Mist!

Cutters Creek Shopping List:
Spellbinder Scallop Circles
Scor Tape
Polar White Flower Soft
Spellbinder Scallop Circles
Diamond Stickles
Copper Stickles
Turquoise Stickles
Copic Markers
Valentine Hanna Stamp

Friday, January 21, 2011

If the shoe fits... Layout by Lori

I rarely scrapbook a single page layout, but sometimes you just don't have enough pictures or memorabilia for more.  I opted to use this layout as a little "about me" page.


I used the awesome Steampunk Debutante papers from Graphic 45 - they fit my personality perfectly! I added some basic cardstock, and on the peachy color, I stamped the piece with a text-y background stamp.  Many of the Tim Holtz stamps would be perfect for a background like this.  My scalloped borders with punched with a punch I had handy, but you can easily do the same thing on your Cricut or other cutting machine.


I cut my title using the Nursery Rhymes Cricut cartridge and my Gypsy, and I cut the gear shapes from the Robotz Cricut cartridge.  I sprayed my title using Pearl Glimmer Mist, and I sprayed the gears using Creme de Chocolat Glimmer Mist.  I let it "blob" some on the gears; I think it gives it an aged effect.


Once dry, I distressed the edges of my gears and my cardstock with ink - the Tim Holtz Distress Ink from Ranger works great!  Then I stamped my gears with various circular stamps, and added some smaller gear-looking stamps to the background as well.  I tossed on a few buttons, some copper embellishments and some crystals.  The Kaisercraft rhinestones come in a great assortment of colors to match any papers.

Be sure to head over and check out all of the papers from Graphic 45!  Every pad has 2 sheets each of ten designs, plus die-cut tags and frames.  You're sure to find one for your upcoming projects.

Products available at Cutters Creek:

Thursday, January 20, 2011

Melissa's Spring Layout

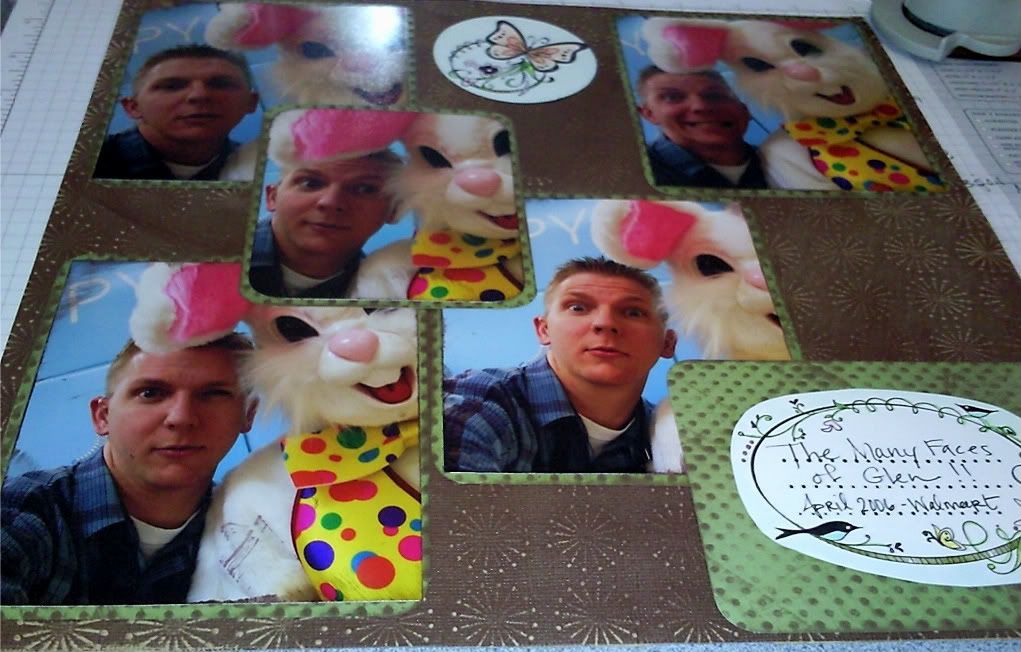
With all of the cold weather going around, I thought a Spring Layout would help set the mood for the wonderful temperatures that must be on their way. (Please!!!)


I'll just share a quick background of the pics below as my husband isn't usually this, umm, odd. Usually.


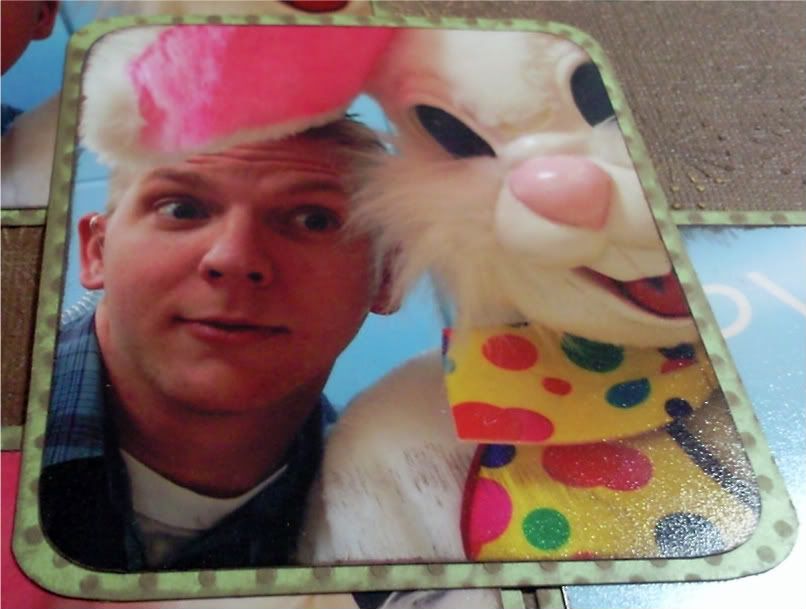
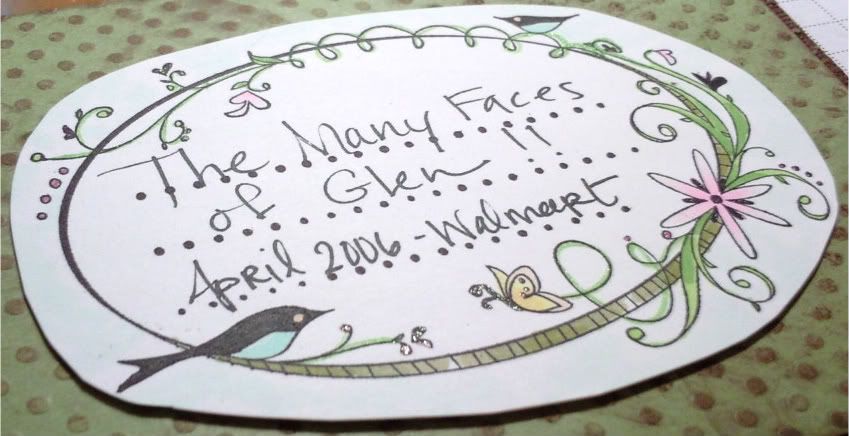
They were taken when my hubby and I were dating. He was a manager at a local Walmart over the electronics and photo areas. Every Christmas and Easter, the photo lab provides 1 complimentary 5x7 of a picture taken with the Easter Bunny or Santa Claus. This was one of my husband's favorite things as he got to pick who dressed up in the suit every time! I had just gotten off of a LONG day from work and my mom and I were going to take him to lunch so we were able to see the tail end of picture time. Can you tell he was bored a few times? Thus the title "The Many Faces of Glen."


I tried to keep it a masculine page with the colors but still keep it "Springish" looking. I started with a 12x12 cardstock from Core'dinations and sanded the page; softly in the center for a lighter look and hard on the edges so they were nearly white. I also used a Rich Cocoa ink over some areas in the center to darken it slightly as well. I then used a light green Swiss Dot cardstock. This is actually one of the best purchases I have ever made. I use this paper for EVERYTHING.


I cut and corner-rounded the green to create mats for the pics as well as the "journaling area." I also distressed it a little as I thought the green was a little too bright for what I wanted by again using my Rich Cocoa ink pad. I used the pad again on the edges of the pictures as well. I really liked how the pictures looked with straight corners over a rounded corner - -I think it adds to the oddness :o) I originally created the layout with only the 4 larger pictures but decided to add the smaller with all rounded corners in the center.


I used some Spring-looking stamps from Hero Arts that I picked years ago. In fact, I think this is the first time I used them too! They are stamped on Simply Smooth cardstock and colored with my handy copics and taped it all together with my new favorite Scor-Tape; can't live without it!! All in all, this layout probably took about 30-35 minutes to make. Definitely my kind of layout. Hope you enjoyed!!


Copics used: G0000, YR000, YR01, R12, R30, RV0000, RV00, RV02, YG11, YG13, YG17, YG91, YG93, YG95


Copics used: G0000, BG10, BG11, YR000, Y000, Y11, Y32, E11, RV0000, RV00, RV02, YG13, YG17, YG91, YG93, YG95, Pitch Black, Pink, Melon, Black Multiliner


Supplies Used:
Bazzill Swiss Dot cardstock
Memento Rich Cocoa Ink Pad
Chomper corner-rounder
copics
Scor-Tape
Black Multiliner
Atyou Spicas

Tuesday, January 18, 2011

Tutorial Tuesday: Glimmer Mist with Laura

Hey, I'm so excited to be here for a Tutorial Tuesday!! More Glimmer Mist fun ahead!! Today I'm going to take you on an Under Sea Adventure with Glimmer Mist!

Here's a nice start to a scrapbook page about a snorkeling excursion we went on.


It's simple, nice enough, but watch what a little Glimmer Mist can do!!

First, using my Bazzill Splat Mat as my work surface, I did a little "test spray" of each color I wanted to use to see how they would look together. I decided to use Tiger Lily, Patina and Dragonfly. I also spritzed my title card with a little light spritz of each.


Next step, was to layer two of the stencils on my blank cardstock....


...and then spritz lightly over them with all three colors (one at a time!). I removed one of the stencils so you see how this will look:


Then to create depth, a different way to use the stencils, is to spray the mist directly ON the stencil like this:


And then put the stencil mist side down on the paper and press down. The best way is to lay a paper towel on top and then use a brayer over the stencil. This makes a "stamped" image on the cardstock like this:


To finish, because I wanted a softer look, I did a "color wash" technique. I sprayed the lighter Patina color over the page one area at a time (about 1/6 of the page at a time) and then quickly wiped it off with a paper towel. You can see the soft streaked effect, especially at the top of the finished page:


So now take a look at the SAME pictures and title, with just a couple of finishing touches on the Glimmer Mist page. WOW....what a difference, huh?? I finished the page by trimming the paper down by 1/4 inch on both sides, distressed the edges and used Tim Holtz Tumbled Glass and Vintage Photo distress inks, applied with the ink applicator and foam pads, and mounted on black cardstock. A journal strip and a few brads finish it off.


And here is a look at my complete two page layout!


Check out these great products at Cutter's Creek!!

Glimmer Mist (Tiger Lily, Patina)
Glimmer Mist Stencils *NOTE* the exact stencils used in this post are not in the store... but I'm sure if you asked Kim nicely she could get them
Tim Holtz Distress Inks (Tumbled Glass, Vintage Photo)
Inkssentials Ink Applicator and Foam Pads
Inkssentials Inky Roller Brayer
Bazzill Splat Mat

And don't forget we want to see what YOU can create with Glimmer Mist! Just post a comment with a link to your newly created Glimmer Mist project on your blog and you could win... MORE Glimmer Mist! Remember, this project must be newly created just for this contest and must use Glimmer Mist somewhere on the project. Judging will be based on a RANDOM draw (all names will be entered into random.org). All entries must be received by 11:59pm on Monday, January 24th. The winner will be announced on Tuesday, January 25th! I hope you all will play along with us!!!

Friday, January 14, 2011

Steampunk Shadowbox with Lori

I'm a huge fan of Steampunk, and one of my favorite things is to combine vintage with bling, so that's exactly what I did for this project.  I started with a shadowbox and the Steampunk Debutante paper pad from Graphic 45.  You can accomplish a similar project with any of the Graphic 45 paper pads - the best part is that they have 2 sheets of every paper, including the punch-out tags & images!  This means you can use an entire image from one sheet and cut portions of the same image from the other sheet, layer with some foam adhesive, and you've got some great dimension going - a must have in a shadowbox.

Here's my completed project:

Now, here are some details and helpful hints.  First, see that big picture in color?  Yeah, there was no spot big enough to put that in the shadowbox.  But lucky for me, there were three smaller boxes in a row that were all the same height.  Here's how I altered the space to contain this picture:

Here's my shadowbox as I bought it.  (You can also find these in thrift stores or antique stores as printer trays, depending on the look you want.)  See how those three spaces line up together?


Here's the picture with it to get an idea of the size.  I did measure the combined opening, and trimmed a bit from the side to fit.  I wouldn't adhere this directly to the top of the frame, because it's likely to get bumped and the picture could get pushed in or torn.  (Especially in my house, where children like to touch things.)


I cut a piece of black cardstock to the size of the picture plus 1".  My shadowbox is 1/2" deep, so I scored the CS at 1/2" on both sides.


I checked the size with the sides folded to be sure it would fit properly, then I adhered the picture to the front (not shown here to make it easier to see).


Once my picture was adhered, I put adhesive from my Scotch ATG on the side tabs and adhered it into the space. 


Now, on to the fun part - decorating!  FYI, sepia toned photographs look great with this paper pad (and with most vintage look papers).  I decided on the papers and items I wanted to use, and dry fit them into each space.  I also cut a Family Time title using my Cricut Expression and the A Child's Year cartridge.  After fitting was complete, I separated my papers and pieces in two piles: neutrals and colors.  I got out my Glimmer Mist and sprayed all of the color items with Pearl, and all of my neutral items with Creme de Chocolat.

Once the Glimmer Mist was dry, I chose some items I wanted to highlight as glossy or a glass-like finish, like this lightbulb and (harder to see) the inner portion of this tag.  I carefully used Glossy Accents to outline and fill these areas and let those dry.

Once dry, I adhered the papers in the spaces using my Scotch ATG.  I added some copper brads to some of my punch-out images, then layered in my punch-outs using adhesive foam squares.

Once everything was installed in the spaces, I pulled out my Stickles for some extra bling.   I used touches of Broken China, Scattered Straw (both Distress Stickles), and Black Diamond on parts of my punch-out images.


 Here's a reminder of the products I used from Cutters Creek:

Thursday, January 13, 2011

Flower Soft Cards by Chris

Need to replenish your stock of cards? Don’t have a lot of time? Turn to Flower Soft. It’s quick and easy and can be adapted in so many ways. Here are two cards I made yesterday using Lavender and Lace collection from Flower Soft.


This first card took less than 30 minutes and 20 of those minutes were waiting for the Flower Soft sprays to dry! I started with an 8 1/2" x 5 1/2" lavender print paper from the kit and scored it at 4 1/4" and folded over. I then used my Cutter Bee Scissors to cut one of the 2 3/4" squares from the kit and inked the edges with Milled Lavender Distress Ink. I also cut a 3 1/4" lavender square (from my stash), rounded its corners with my Corner Chomper and inked the edges with Milled Lavender. I centered both squares and adhered them to the card base. I then took one of the wire stems from the kit and cut it into seven 2" lengths. I dripped Flower Soft glue over one end and then sprinkled Light Lavender (in the kit) on 3 of the wires and Dark Lavender (in the kit) on 4. I stuck the other end of the wires in a piece of foam so they could dry without being flattened. While they were drying, I cut out one of the cone pieces in the kit, inked it, and rolled the cone and glued it together. When the sprays were dry, I gathered them together, did a bit of rearranging, clipped the ends of the wires so they were of equal length, dabbed some Flower Soft glue on them and pushed them into the cone. I added a ribbon bow to finish it off and glued it to the card-base. Once this was dry, I bent the sprays to make them look more realistic. There are step-by-step directions for this right in the kit! The sentiment is a Happy Birthday stamp I have; I used a glue pad and sprinkled glitter over it. To give a little extra glam to my card I spritzed the whole card with Old Lace Glimmer Mist.


This next card is just as easy! Using the same card base measurements and scoring, I took a 4 1/4" x 51/2" piece of pink Core’dinations Cardstock, put it through my Cuttlebug with Tim Holtz’s Regal Flourish f (any folder would work here), and sanded the design to reveal the core. I then used a border punch to trim the 4 1/4" x 3" rectangle from the Lavender and Lace kit. The flowers were very small here, so I poured some Flower Soft adhesive on waxed paper and used a toothpick to put the glue where I wanted it. I sprinkled the Light Lavender Flower Soft over the glue and pressed it down lightly. Once I tapped off the excess (very gently), I sprinkled some dark glitter over the flowers. I then cut out the two ovals from the kit. On the bottom oval I used used Purple Stickles to outline the oval and some of its design. To highlight the sentiment that’s already printed on the top oval, I used a Purple Sakura Gel Pen and just traced over it to give it some dimension. I wrapped a piece of gauzy pink ribbon around the middle of the card front, layered the rectangle and base oval, and used Pop Up Glue Dots to lift the Happy Birthday layer. The base rectangle has the image of two bows between the flower soft sprays, so I took some of the ribbon from the kit and made tiny bows that I used Glossy Accents to glue to the card. I still wanted to add a bit more so I made a paper rose (the spiral rolled kind) and spritzed it with Pearl Glimmer Mist and glued down with a Glue Dot.

Two gorgeous cards done and I still have tons more Flower Soft and card mounts to work with. Check these kits out and you can make some fast beautiful cards too!

Tuesday, January 11, 2011

Tutorial Tuesday - Using Glimmer Mist with Mandie

So did last weeks post make you hurry over to the Cutters Creek Store and stock up on the Tattered Angels Glimmer Mist? If you did you're going to want to try the ideas in this post! If you didn't I sure hope this post will put you in the shopping mood!

Grab some scrap White Cardstock and a scalloped circle punch or Cricut or Spellbinders die and punch a bunch of circles! The punch I used makes circles that are about 2" but you can actually go a little smaller or larger based on your preference!

I punched about 15 circles here. I figured if I'm going to make my own embellishments I might as well make a couple while I have all of my supplies out...

Next I grabbed one of my favorite script background stamps and my Tim Holtz Distress Ink in Walnut Stain. You can really use whatever image you want but I LOVE the look of the words. You could even grab a single word stamp or use some alphabet stamps to spell a word and stamp it repeatedly. I like to stamp both sides of my punch but you don't have to... in fact you don't really need to stamp at all!

Next I grabbed three bottles of my Glimmer Mist, Walnut Gold, Coffee Shop and Tattered Leather. I really want a lot of depth in this project. As you will see a bit farther down the post you can also do this technique with a single color... Also notice I have my Bazzill Splat Mat covering my desk. This is really important because it will keep you from dying your desk as well as protecting it from the heat of your heat gun.

The first layer is the Walnut Gold. I just did about one or two sprays per flower. Two things to remember, mix your spray WELL before spraying and keep your hand moving while you are spraying.

I repeat the spraying with the Coffee Shop Glimmer Mist trying to sort of hit different areas.

Finally I used the Tattered Leather. Then layer another paper towel over the top and flip it over and repeat on the other side!

Next you're going to want to crumple your circles up into a nice wrinkly ball. You don't have to crush it... you just want some nice wrinkles. Now, grab your heat gun and dry them a little bit.

Next you are going to un-wrinkle them a bit. You want some of the creasing to stay so don't totally flatten them out. Grab that heat gun again and dry them all the rest of the way.

Here's what you will end up with. At this point these should be completely dry. On a side note, you may tear one or two while you are unfolding them (if you look closely you will see I did) and it's NO big deal. It adds to the character of your finished flower. But, if it bugs you... it's a good idea to initially punch and stamp a few extras...

Now, before I put my heat gun and my Glimmer Mist sprays away I decided that I wanted to create a card for this lovely flower to adorn so I grabbed a piece of lace from my stash and spritzed it with Coffee Shop and Vintage Pink.

Then I stacked up 5 of my scalloped circles and stuck my paper piercer through the center. Then I carefully added my brad to the center. This brad is covered in pink corduroy but it looked too "new" to go with my card so I gave it a little spray of the Coffee Shop Glimmer Mist.

Then I stuck a Pop Up Glue Dot to the back of my flower. I used the Pop Up Glue Dot because my flower has so much dimension I really wanted it to stick to the front of my card well.

After adhering the lace this is my completed card! I haven't decided what occasion this card will be for yet. I love that I could literally use this for ANYTHING! Sympathy, Birthday, Thinking of You... it really is what ever you make it!

I also have one more quick idea for you. I used the same technique as above with punching and spraying these flowers. I only used only one color, Purple Pansy, to mist these and I didn't have to stamp them because there was already a pattern on the paper.... any guesses to what this started life out as?

Here is one with out the mist.... give up? It a security envelope that one of our bills came in! Take a look at some of yours next time you are paying the bills. There are some really fun patterns that most of us just toss in the trash or shredder! This paper is a bit thinner than cardstock so you want to be a tiny bit gentler with it when you are crumpling and uncrumpling it!

Poke through your stack with a paper piercer and find a pretty brad for the center....

And you end up with THIS beautiful flower! You never knew garbage could look so amazing did you? Now, Glimmer Mist adds beautiful sparkle on its own but you can add a little more by pulling out your....

Icicle Stickles! Yep, I had to add even MORE bling to this flower! But what should I do with it.... another card.... nah, been there done that.... a layout? I should but I just don't have the TIME! I know....

A hair clip! I just hot glued some green ribbon to a plain clip. Then added a looped piece to make the "leaf" and finally hot glued my flower on top of that!

And here's my daughter modeling it. Yeah, the flash sometimes makes her eyes go funny... but doesn't she look cute?

So now we want to see what YOU can create with Glimmer Mist! Just post a comment with a link to your newly created Glimmer Mist project on your blog and you could win... MORE Glimmer Mist! Remember, this project must be newly created just for this contest and must use Glimmer Mist somewhere on the project. Judging will be based on a RANDOM draw (all names will be entered into random.org). All entries must be received by 11:59pm on Monday, January 24th. The winner will be announced on Tuesday, January 25th! I hope you all will play along with us!!!
Related Posts with Thumbnails